Getting started#
Before we dive, headfirst, into the fundamentals of programming in Python, let’s take a whistle-stop tour of running code in a Jupyter notebook.
First off, open up a new Jupyter notebook via Noteable, as described previously in Lab 0 (If you haven’t completed Lab 0, then now would be a good time…). You should be greeted with something like:
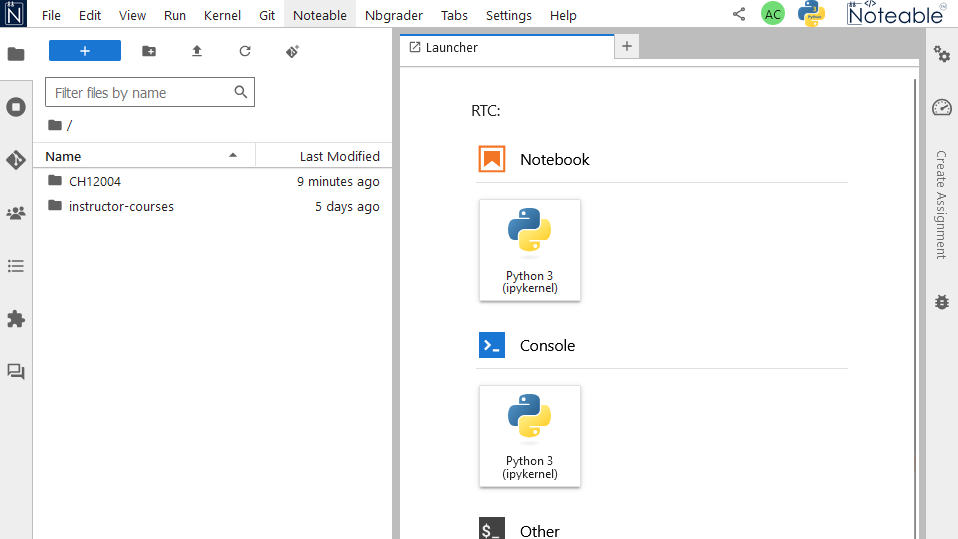
You should be able to see the CH12004 folder you made in Lab 0. Navigate to this folder by double clicking it.
Now create a new notebook and name it Lab 1.ipynb. It is good practice to give your notebooks a more descriptive title than “Untitled”.
Remember - Do not delete the .ipynb extension when renaming your notebook - Noteable will break if you do!
Jupyter notebooks are made up of cells; in your new notebook, there will only be one cell at first: the grey box with [ ] to the left of it. We can start writing some code in a cell by clicking inside of it so that a blue border appears:

Now just start typing!

Here our code is pretty easy to interpret even if you’ve never learnt any Python before: 2+2. At the moment, we have written this code, but we have not run it, so the calculation has not actually been performed.
To run a cell in your Jupyter notebook, make sure it is currently selected (it should have a blue border ) and press Shift + Enter:

Sure enough we now have an output, here the result of our simple calculation of 2+2. Notice the numbers in square brackets to the left of the cell itself: [1]. These represent the order in which our cells have been run. We can see this by running some more code (notice that Jupyter has added an empty new cell beneath the first one):
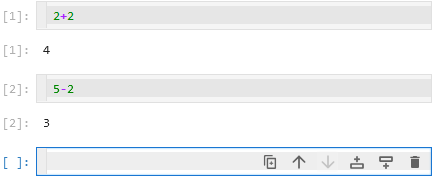
To reproduce the above, just type out the code in the second cell 5-2 and press Shift + Enter again. You should see that the second cell has [2] to the left of it, indicating that this cell was run after the previous one. If we select the first cell again and run it for a second time:
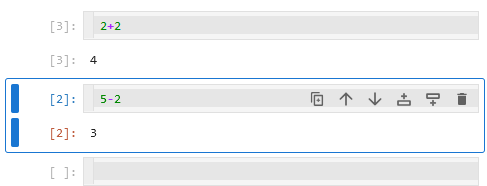
We see that the numbers to the left reflect this, showing that this cell was the third to be run overall: [3].
In this book of lab material, we will represent code cells like this:
2+2
If we are interested in not only the code itself, but also what happens when it runs, then we will show both the code and the output like this:
2+2
4
This is equivalent to:
Before we crack on with the rest of the course, try running the following code in a new cell:
1 + '1'
You should find that you get an error message:
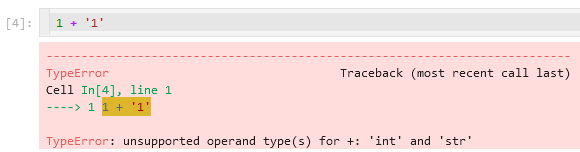
Python, and for that matter all programming languages, use error messages to highlight problems in your code. In this case, don’t worry about what the message means - we will come back to errors in much more detail later on - just be aware that this is what they look like and that if you see one, you don’t need to panic!
Okay, that about does it for getting started with running Python in Jupyter notebooks. There is quite a lot of useful functionality in notebooks that we have glossed over here, so feel free to give our more verbose guide a quick skim read now, and refer back to this in future when needed.